C++ Software Environment
Visual Studio Code
In this class, we will be using Microsoft Visual Studio Code(VSCode) to write code and to interact with a remote computer to code. VSCode has nice plugins for syntax highlighting, code completion, and built in documentation for C and C++. Visit this link to download VSCode for your appropriate operating system. Most Windows and Linux users will want the 64-bit download. Please post on Discord if you are having any issues installing VSCode.
Setting Up Remote Computing with VSCode
Motivation: So that everyone in the class has the same set of software tools, students will log into a remote computer using a service called secure shell (ssh). Luckily, VSCode has a very nice add-on that makes it easy to connect and code on remote computers. You can read more information about it at this link, but I will summarize the important information below
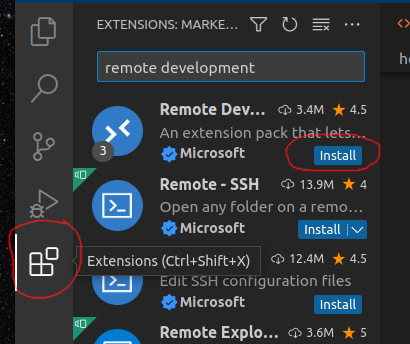
Step 1: Install Remote Development Extension Pack
First, search for Microsoft's Remote Development Extension Pack in the extensions store:
Step 2: Connect To Server
Type either F1 or Ctrl+Shift+p to open up the "command palette" input for vscode, and search for Remote-SSH: Add New SSH Host... and press ENTER

Then, enter username@computer, where username is your username on nimbus and type ENTER:

If the following pops up, simply select the default option

At this point, the host has been added to your configuration, so you can connect to it by going back to the command palette, searching for Remote-SSH: Connect to Host... and select

then select nimbus and enter your password

If at any point it asks what the platform is, select Linux.
At this point, a new VSCode window should pop up. Click on the file explorer to open up the folders on your account on that computer:

Select any folder to view the contents in it:

Now you can open any file there and code!
VSCode Command Line
A huge part of CS 174 is learning how to manage code using the command line, or "terminal" for short. This is an essential skill for any programmer, particularly those working on any modern team in software engineering or cloud computing. There are myriad ways to launch the terminal, and it even has its own dedicated menu in VSCode. Once you've logged in using the directions above, you can launch a terminal at the bottom of your code environment, and you should see something like this:

Live Server Plugin
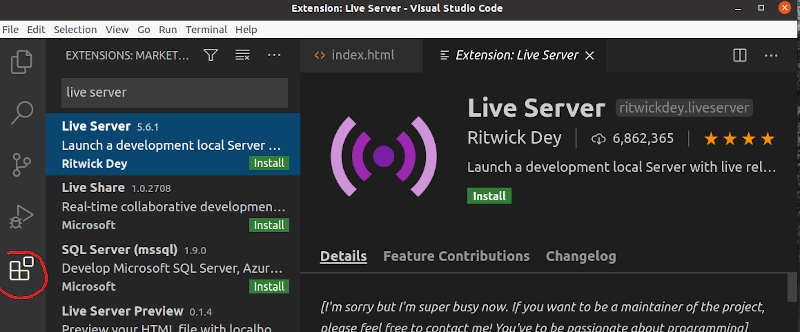
One more extension you'll need to install will come in handy when we do animations. Once you've logged into nimbus, go to the plugins search in that window and search for the "live server" extension by Ritwick Dey
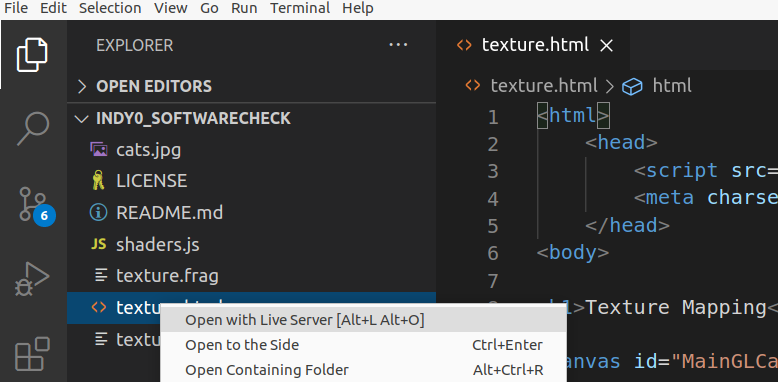
Then, open a top level folder containing the code that you want to run, right click on an HTML file you want to run, and click Open with Live Server
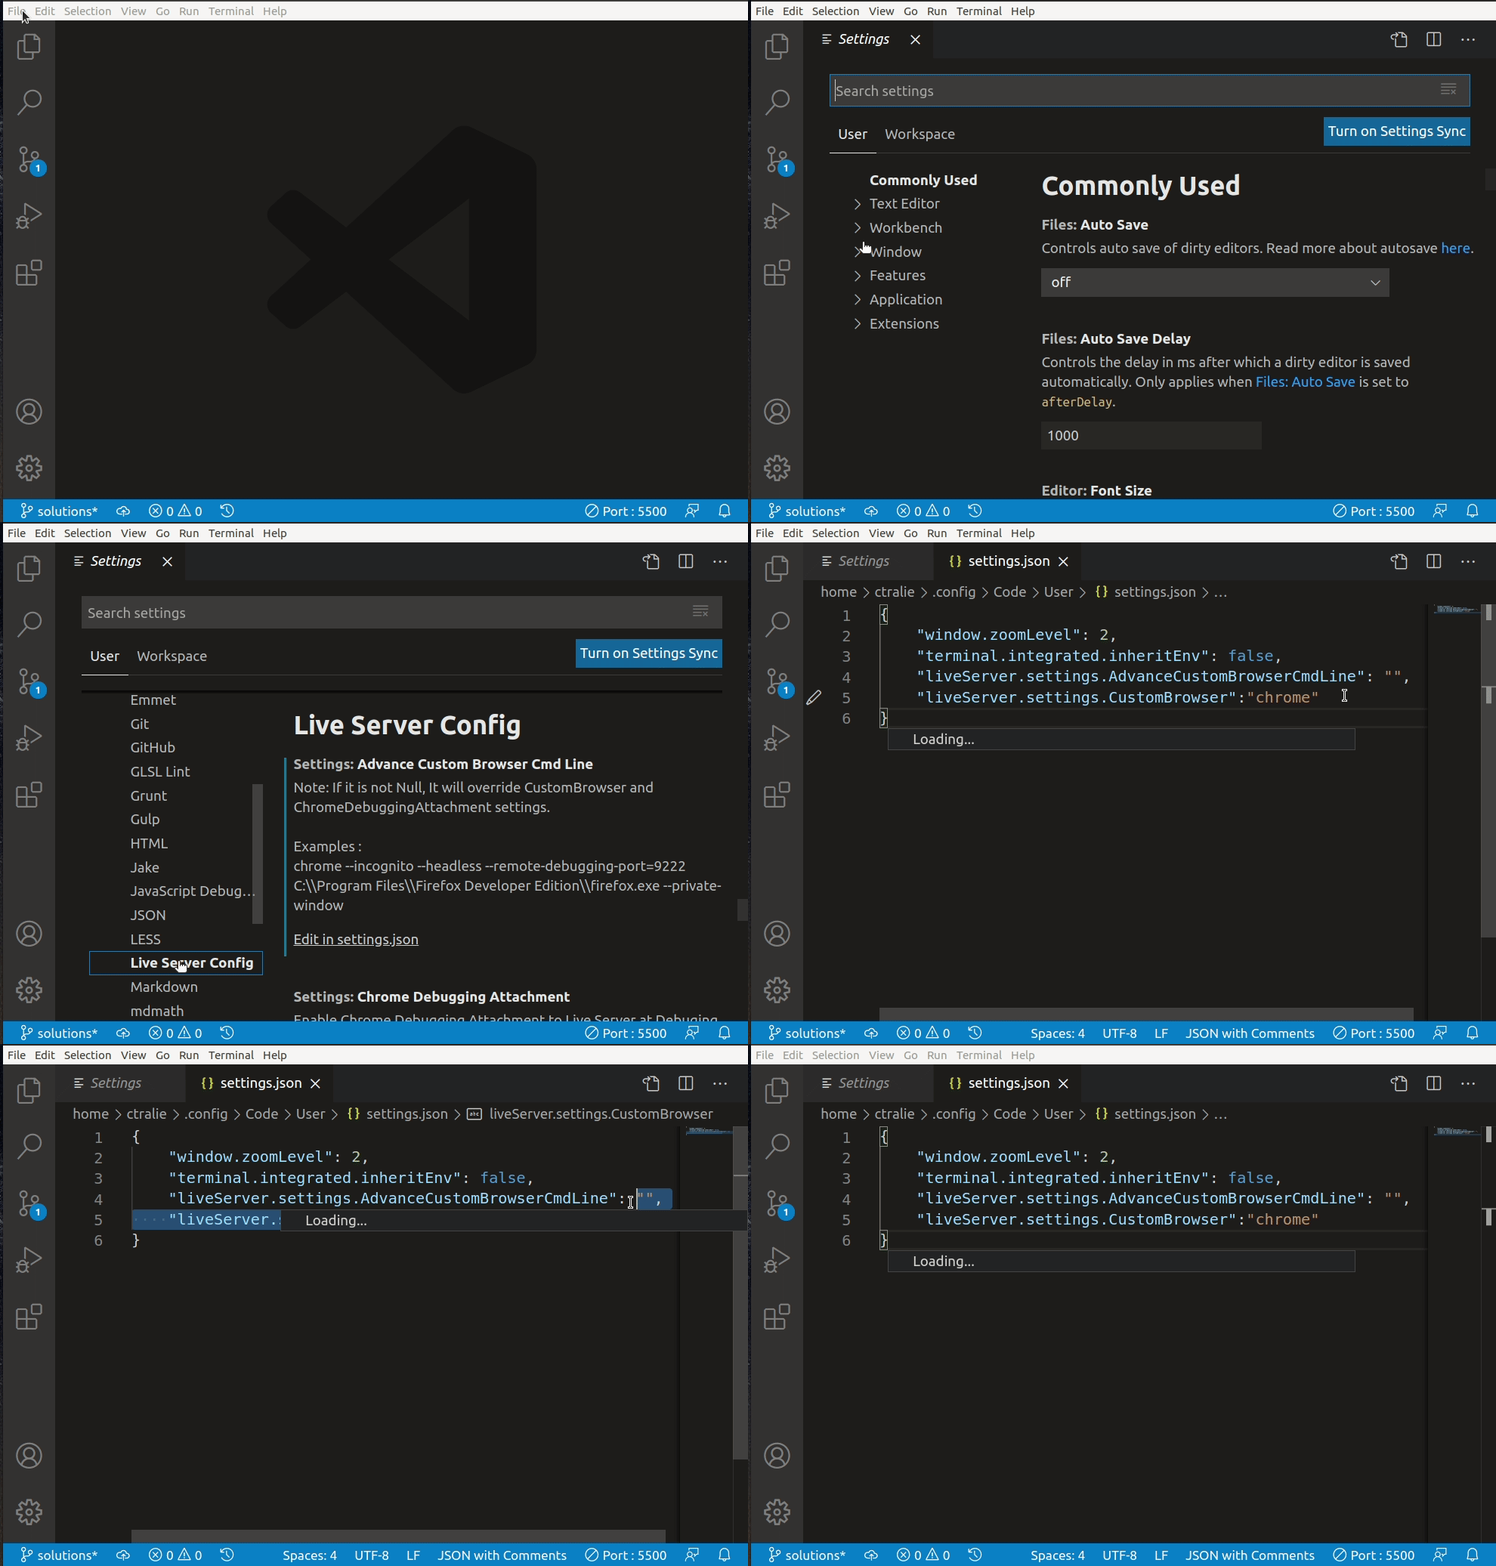
If you want to change the default browser that opens with the live server, then you have to change the settings.json to have the CustomBrowser field. For example, my settings.json file has the following code to get it to launch Chrome by default
The GIF below shows how to access the settings.json file
NOTE: The assignments have been tested in Firefox and Chrome, so it's best if you stick to one of those browsers.
Other Recommended Plugins
Below is a list of additional recommended plugins for this class that you should install
- ms-vscode.cpptools
- ms-vscode.cpptools-extension-pack
- ms-vscode.cpptools-themes
- twxs.cmake
- streetsidesoftware.code-spell-checker
Other Features
Below are a few features I want to highlight that will come in handy as your working.
Unused variable highlighting
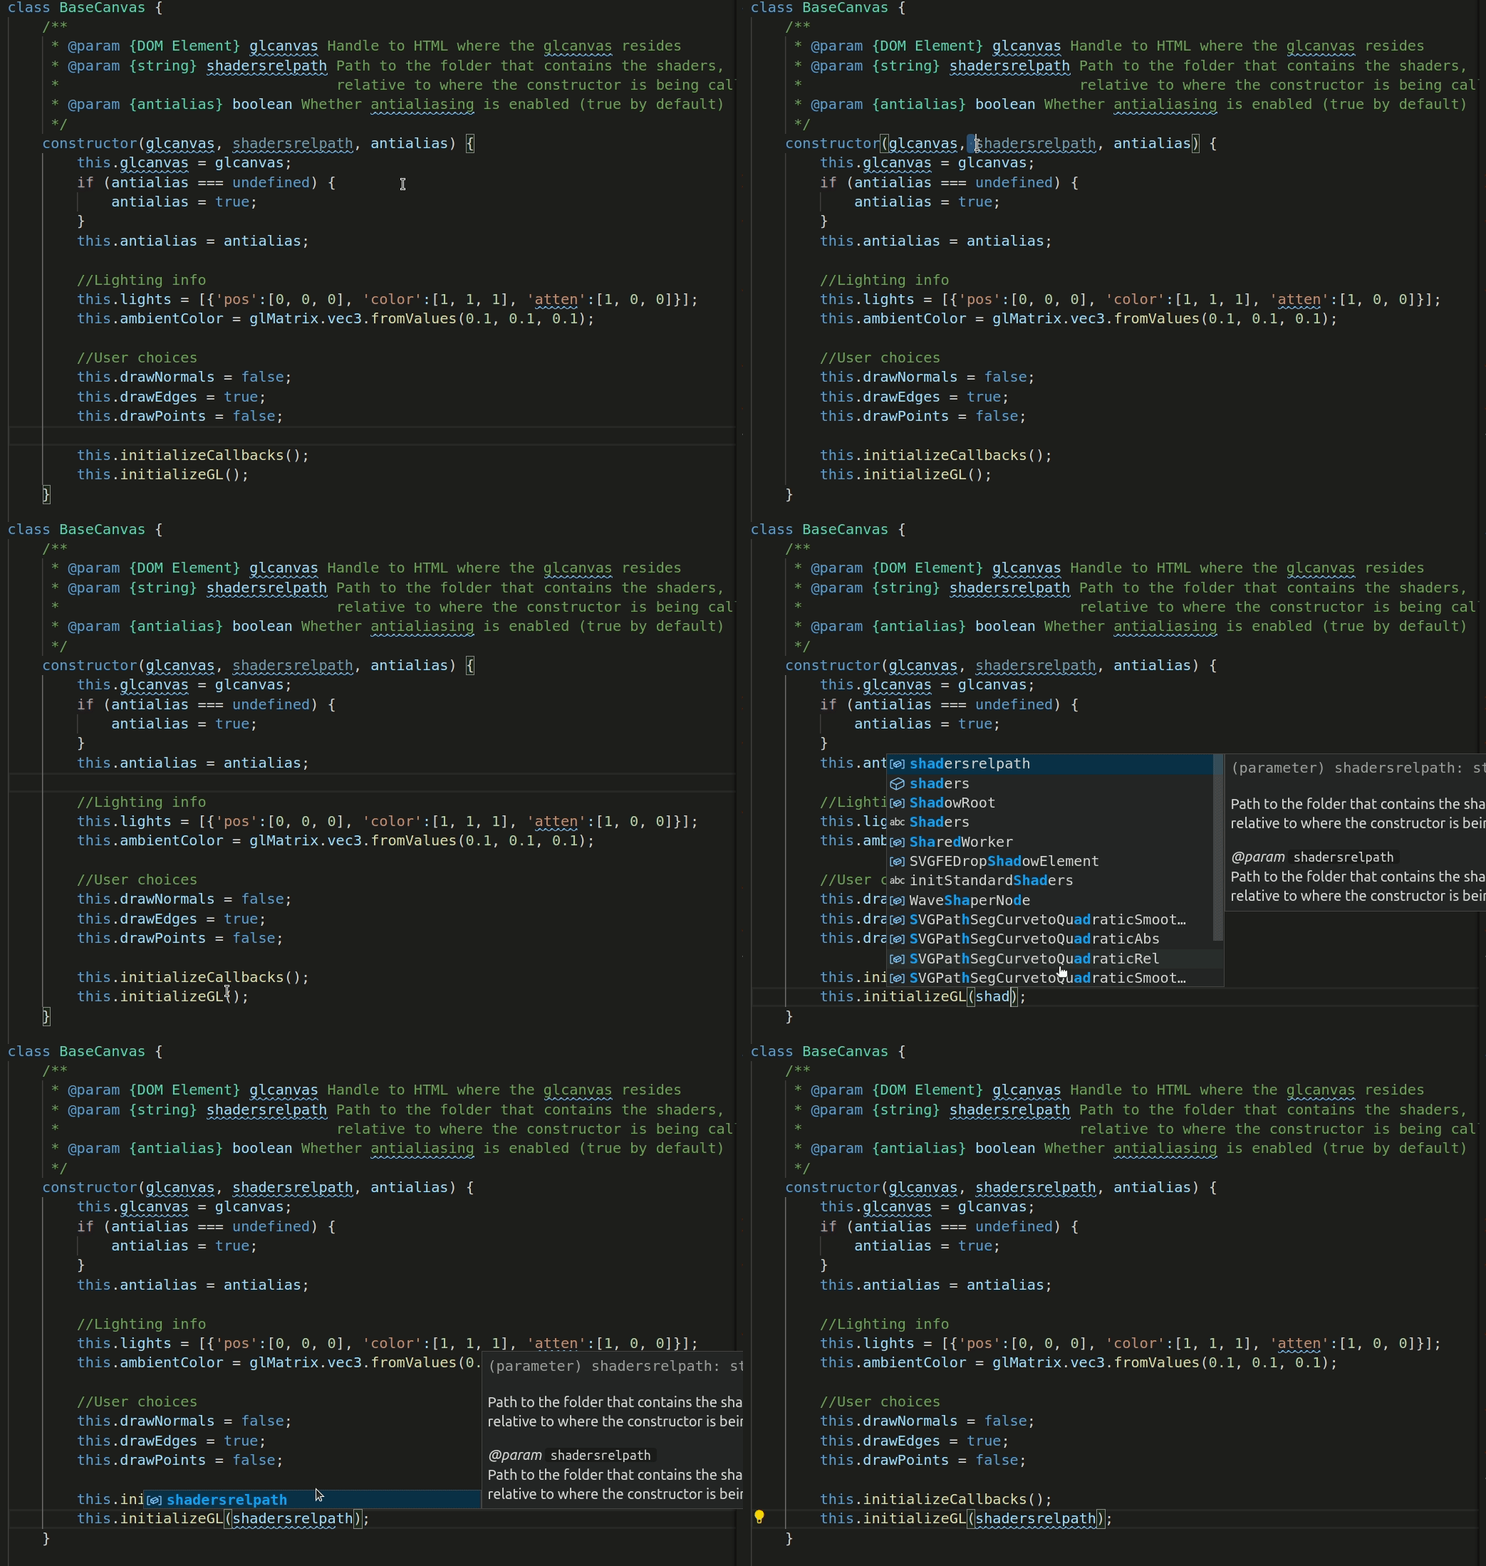
If you don't use a variable, it will show up in darker text. This is very useful when debugging. It means that either you didn't actually need the variable, you forgot to use it (hence you didn't complete your code), or you spelled it wrong somewhere. This saved many a student last year! (NOTE: The examples below are in Javascript, but the same applies to C/C++/assembly)
Replace within Selection
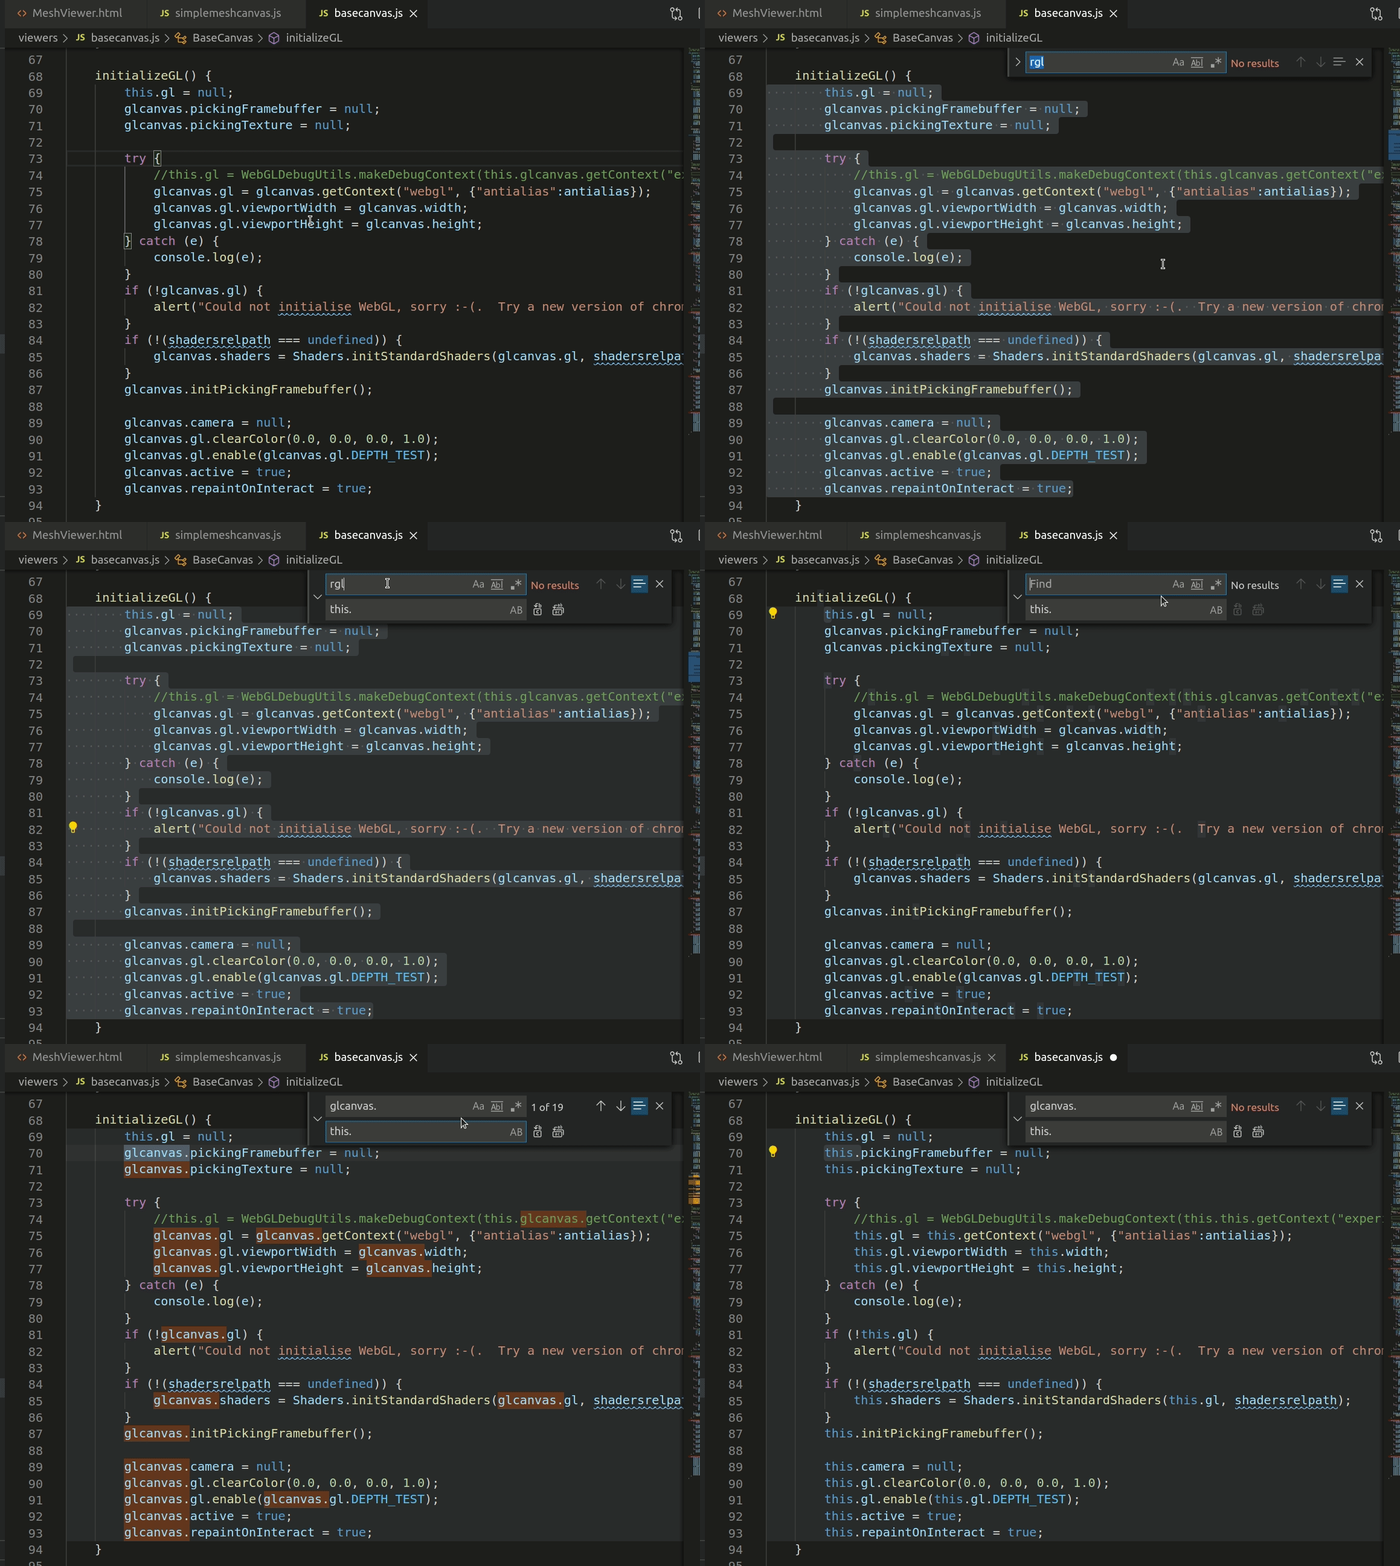
If you want to change the name of a variable in one section of your code, you can do a CTRL+F, which will bring up the find/replace menu, then follow these steps:
Method Documentation
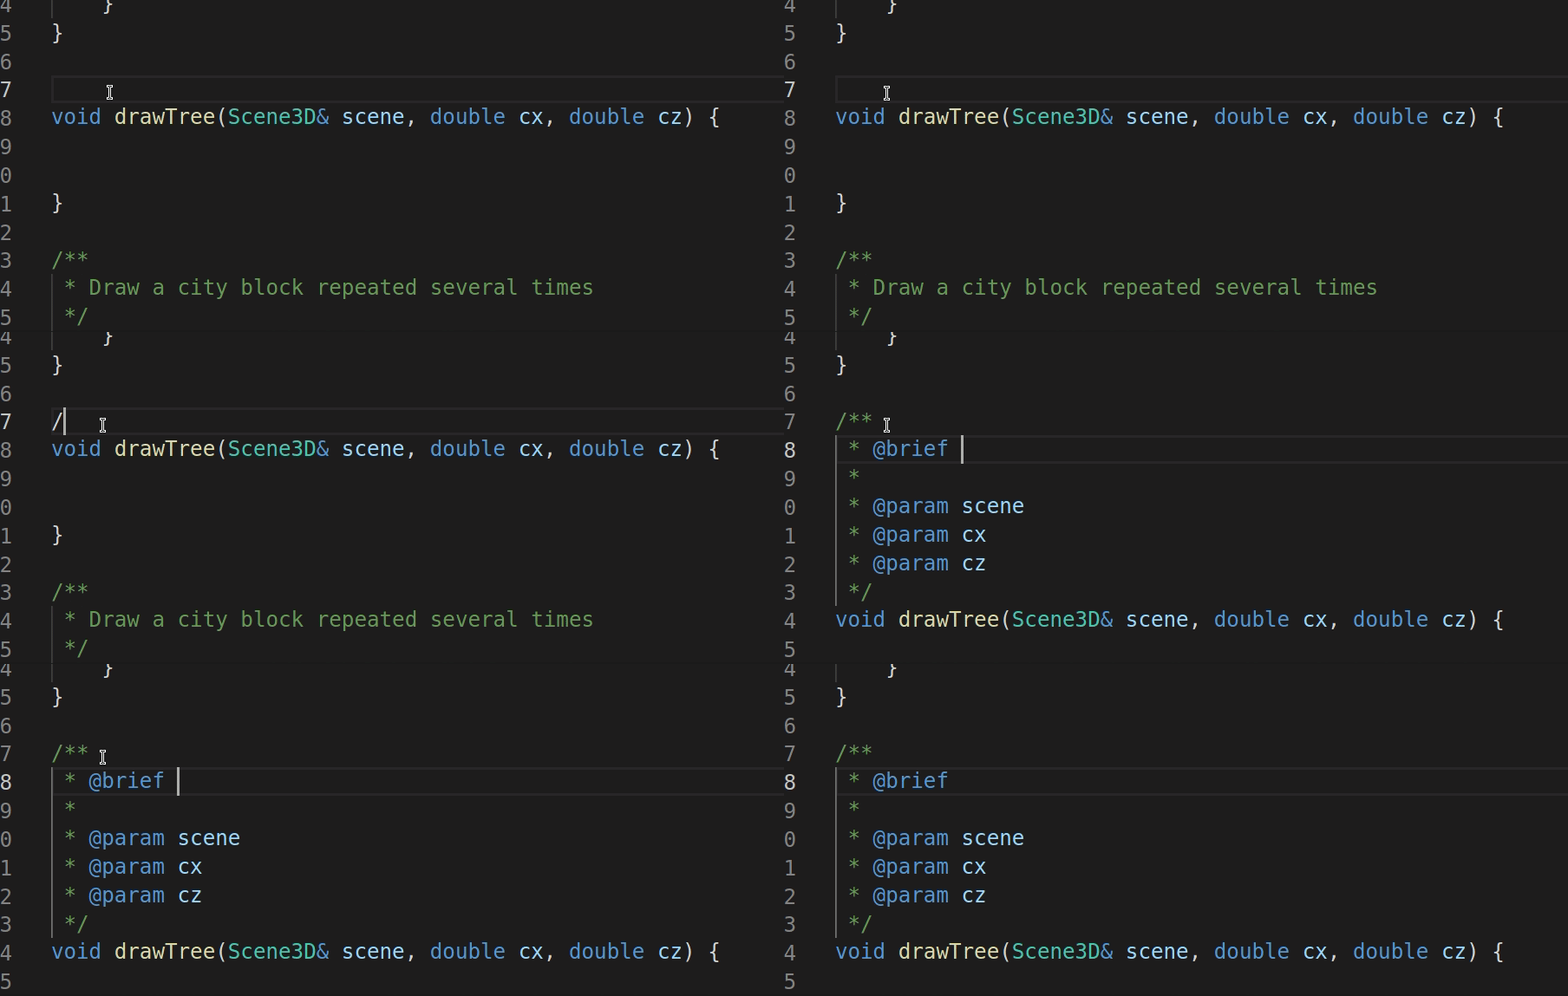
There's a nice feature where if you start typing /** and hit ENTER, it will autocomplete method documentation for you
